
Getting started
First launch
On first launch Granspace asks where your projects live. Everything starts from there.
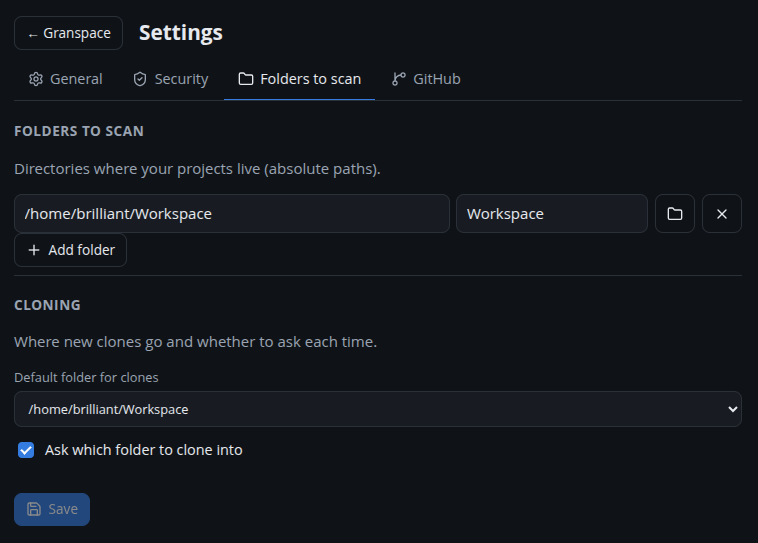
1. Add your project roots
Open Settings → Folders and add one or more absolute paths where your projects are kept, for example:
/home/you/Core/dev
/home/you/work
Granspace scans these roots (one level deep) for anything that looks like a project
— a git repo, a package.json, a composer.json, a compose file, and so on
(detection is driven by extensions).
2. Discover projects
Use Add → Discover projects (or the tray/menu shortcut). Granspace lists what it found under your roots but isn’t managing yet — tick the ones to add.
You can also:
- Clone by URL — clone a git repo into a root and track it.
- Import from GitHub — list your repos (needs a token for private ones) and clone/track them.
- Drag a folder onto the window (desktop app) to track it directly.
3. Organize
Once tracked, a project shows as a card. Set its stage and purpose, add tags, mark favorites, and open Details for everything else. See Organizing and The dashboard.
Optional: self-configuring projects
Drop a granspace.json in a
project and Granspace applies it when the project is added — install commands, env
keys, auto-start and more.